Introduction
In the old days, you’d write code and allow another team called Operations (or OPs for short) to deploy it to various servers for testing, and eventually production. Quality Assurance teams would be testing your code from a few days to a few weeks ago on another server.
Developer tooling, infrastructure as a service, and shorter development cycles have changed all that. The Amazon practice of “you build it, you own it” has started to filter out to other companies as an adopted practice. Teams are now expected to build, deploy, and maintain their own software.
Today, I wanted to cover what I’ve learned about automated deployments around AWS. You’ll learn why you don’t need Ansible, Chef, or even Serverless, and instead can use AWS API’s to do everything you need.
Code
The source code for this article is on Github.
Contents
- Infrastructure As Code
- Infrastructure As An API
- Destroy, Build, and Test Your Lambda
- Step 0: Authenticate
- Step 1: Code Setup
- Step 2: Mad Creds
- Step 3: TDD
- Step 4: List Lambda Functions
- Step 5: Create Lambda Function
- Step 6: Delete Your Lambda Function
- Step 7: Making Testable Code by Testing It
- Step 8: Build a Command-Line Tool
- Step 9: Multiple Environments & Green Blue Deployment
- Step 10: Integration Test
- Conclusions
Infrastructure As Code
Servers As Pets
In the old days, you treated servers as a part of the family. You named them, constantly monitored their health, and were extremely careful when updating code or applying security patches to them.
As time went on, hardware got cheaper, and green blue deployments came about. You still had physical servers at your place of work or nearby, but you had 2 instead of 1 production boxes that you switched between.
Disposable Infrastructure
The cloud being cheap changed all that. Eventually servers became so cheap and easy to make, you just destroyed and created new ones at the first sign of trouble.
Infrastructure == Code
The Infrastructure As Code movement, in short, is that all your servers and API’s and builds… are code. Not JSON, not YAML, not even XML (lol, wtf). If you want to update a server, deploy new code, or update a library version, you simply change the code and check into version control.
As a coder, the reasons I like this are:
- I’m a coder, I write code, and that makes it something I can more easily understand.
- Source code is put into version control. Our releases are the same thing as our code versioning.
- Version control has a record of all changes.
- Team can peer review server/deployment changes increasing quality.
- I can unit & integration test my infrastructure code more easily because why? It’s code.
Infrastructure as an API
You can build and destroy a lot of things using the AWS console, the web site you use to access your AWS account. However, everything on AWS is an API. While Lambdas are only JavaScript, Java, C#, and Python, you have more language choices, both official and non, to manage your AWS infrastructure such as Shell and Haskell. We automate these processes using code around these API’s AWS gives us.
As a JavaScript Developer, it’s perfect for me because my local Node development environment is in JavaScript, my front-end Angular is written in JavaScript, my REST API’s are written in JavaScript, and my infrastructure deployment code is now written in JavaScript. Some of the Jenkins job creation/deletion/staring is in JavaScript. Daddy has Thor’s hammer Mjölnir, some FullStack gauntlets of power, and everything in software is suddenly an orcish nail.
Immutable Infrastructure
When disposable infrastructure came into fashion, there was this concept of destroy and build. Rather than debug and nurse a particular server back to health, it was faster and more predictable to just destroy it and build a new one. As this process matured, it eventually became known as “immutable infrastructure”.
Just like how nowadays you try to avoid mutable state in your code, you treat your servers and API’s the same way. Since they are now a result of your code creating it, this is easier.
Mutable State Lives On
However, there are some statefull things you can’t really remove. URL’s for one thing. While API Gateway will give a brand new, unique URL each time you create a REST API, the URL to access your website doesn’t change. Mine is jessewarden.com. If I were to destroy my website’s server and code to update it to the latest code on a new server, I’d still want to use the same URL.
In programming, we use constants for these types of things, and that’s no different here. For statefull things that do not change, or perhaps are updated later, you’ll create variables for these.
Don’t Update. Instead Destroy, Then Create a New One
Everything else, assume it’s immutable. If you update your Lambda code in Gitub, don’t update it in AWS manually. Destroy and then create a new one with the latest code which takes seconds.
Treat your infrastructure like you would your state in Redux:
const newLambda = Object.assign({}, currentLambda, {updated: latestGitCommit});Destroy, Build, and Test Your Lambda
While larger applications are made up of many API’s, databases, storages, and front ends, we’ll pick a small piece that should be able to be built & deployed independently. Let’s destroy, build, and test our newly built Lambda. Afterwards we’ll update some code in our Lambda to show you how you update over time.
Before we start, you should know that AWS Lambda has a nice alias and versioning functionality. I don’t use any of it and I don’t consider it useful. Same with API Gateway stage deployments. Once you start automating things and synching with your Git Feature Branch or Gitflow workflow, the Lambdas, API Gateways, and Buckets you create are then result of your code versioning. I’m only 3 months in so perhaps I’ll change my mind next year.
Versions are custom names such as “v1.0.0”, while “$LATEST” which you can’t delete is basically equivalent to Git’s “master”. They can be treated like Git tags. Aliases are names such as “dev”, “qa”, and “prod”. They don’t have to be environment based, but it helps because you can say “dev is pointing to $LATEST” and “qa is pointing to git tag 1.2.7”.
Also note, none of this has any rollback functionality. If you screw up, that should be considered OK. The whole point of using code to destroy and build is so you can have confidence that “rolling back” is simply switching to a stable Git tag and rebuilding your stack from scratch which takes seconds to minutes.
Easier said then done. For 2 weeks my API Gateway destroy functions were destroying the first api gateway it found that matched a substring. Whoops. #WithGreatPowerComesGreatResponsibility
Crash Course Into AWS Terminology
If you already know these, skip to Step 0.
AWS: Amazon Web Services. Amazon provides hard drives in the cloud, virtual servers, and all kinds of other amazon tools to build applications in the cloud.
AWS Console: The website you use to access your AWS account and build, destroy, and configure your various AWS services.
Lambda: A function that Amazon hosts and runs for you. Hot serverless action.
Environment: Arbitrary name given to a “different server”. Typically “dev”, “qa”, “staging” and “prod”. Ensures code can be moved between servers and not break.
Region: AWS hosts data centers in physical locations throughout the world. Each has a name such as “us-east-1” for my neck of the woods and “ap-southeast-2” for Sydney, Australia. You can have the same code and files run on those regions to be faster for your users.
API Gateway: Create URL’s that are typically used for REST API’s, but you can create them for mocks for simpler integration testing, or simple proxies to existing REST API’s.
ARN: Amazon Resource Names. Everything in AWS has a unique ARN. They’re like URL’s for websites. They look intimidating at first, but creating them yourself becomes pretty trivial once you learn the format.
Step 0: Authenticate
Good news about Step 0 is you only have to do this crap once.
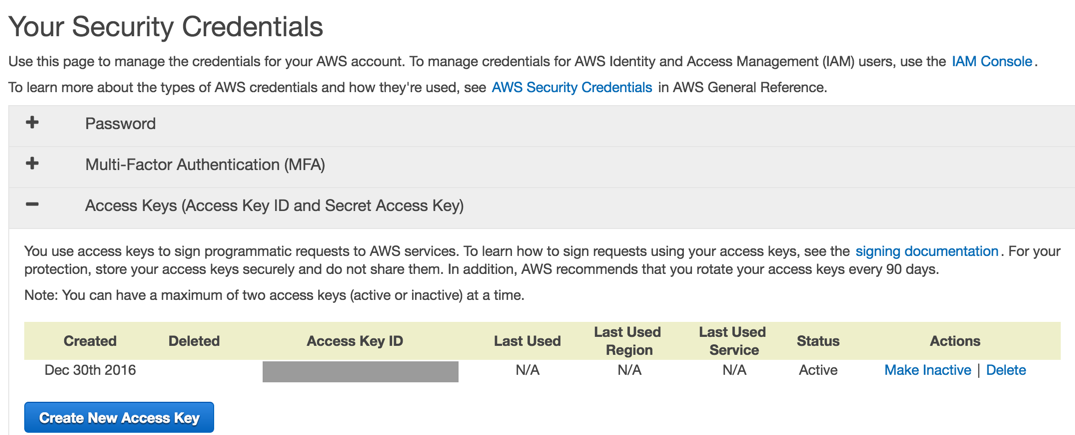
Although we’ll be using Node for this tutorial, you’ll need your credentials to authenticate with your AWS account (if you don’t have one, go sign up, button on the top right). For security reasons, you should create an IAM user that doesn’t have access to all the things. However, to keep this tutorial simple, we’ll use a core credentials.
In the AWS console, click your name, choose security credentials. Choose Access Keys, then click the “Create New Access Key” button.
In the popup, click the tincy blue arrow link to “Show Access Key”.
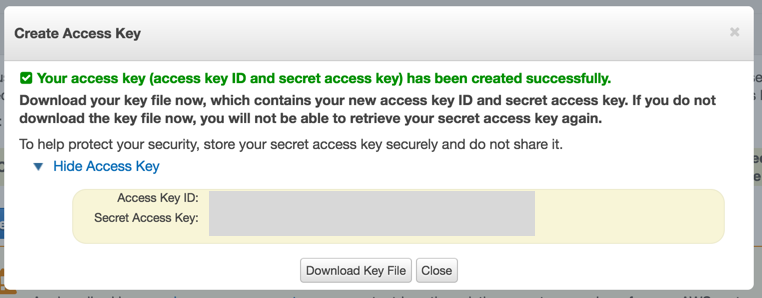
Create a new JSON file called “credentials.json” on your computer and paste in the following code. If you’re using source control, ensure you git ignore the credentials.json file so it’s not checked into source control, yet can still remain in your code project.
{
    "accessKeyId": "your key here",
    "secretAccessKey": "your secret access key here",
    "region": "us-east-1"
}
Step 1: Code Setup
Make a folder, open your terminal, cd to the directory, run npm init and hit enter until it stops asking you questions, and finally run npm install aws-sdk --save. I’m using Node v7.3.0, but you can use whatever. Use nvm to switch to different versions at will.
Create a new JavaScript file called “index.js” and put in the following code. This is our basic lambda function that just returns a hello world message.
exports.handler = (event, context, callback) =>
{
    const response = {
        statusCode: '200',
        body: JSON.stringify({result: true, data: 'Hello from Lambda'}),
        headers: {
            'Content-Type': 'application/json',
        },
    }
    callback(null, response);
};
Step 2: Mad Creds
Create a new JavaScript file called “build.js”, and put in the following code.
const log    = console.log;
const AWS    = require('aws-sdk');
AWS.config.loadFromPath('./credentials.json');
That 3rd statement is synchronous and must appear before you instantiate any other AWS objects/classes, else you’ll get weird authentication errors.
Step 3: TDD
Note the below are unit tests, not integration tests. Integration tests are tricky not to cause leaky state, so we’ll start with unit tests first. We’ll be using Mocha and Chai, but if you are a Tape or Jasmine fan, feel free to use those instead. Run npm install mocha chai lodash --save. Open your package.json, and change the scripts section to look like this:
"scripts": {
  "test": "mocha build.test.js"
},
Create a new file called “build.test.js”, and put in the following code:
const expect = require("chai").expect;
const should = require('chai').should();
const _ = require('lodash');
const {
    listFunctions
} = require('./build');
Chai has various assertions, “should” reads better than “expect”, and we’ll be using Lodash for creating our own predicates. To avoid using Sinon, we’ll be making our functions as pure as possible. To do that, we’ll need a simple mock for the AWS Lambda client:
const mockLamba = {
    listFunctions: (params, cb) => cb(undefined, {"Functions": []})
};
Our first test is to read a list of functions:
describe('#listFunctions', ()=>
{
    it('should give a list of functions', (done)=>
    {
        listFunctions(mockLamba, (err, data)=>
        {
            _.isArray(data.Functions).should.be.true;
            done();
        });
    });
});
To run them, in your terminal type npm test and hit enter. You should get an error like “ReferenceError: listFunctions is not defined”.
Step 4: List Lambda Functions
Let’s define it:
const listFunctions = (lambda, callback)=>
{
var params = {
MaxItems: 50
};
lambda.listFunctions(params, (err, data)=>
{
if(err)
{
log("lambda::listFunctions error:", err);
return callback(err);
}
callback(undefined, data);
});
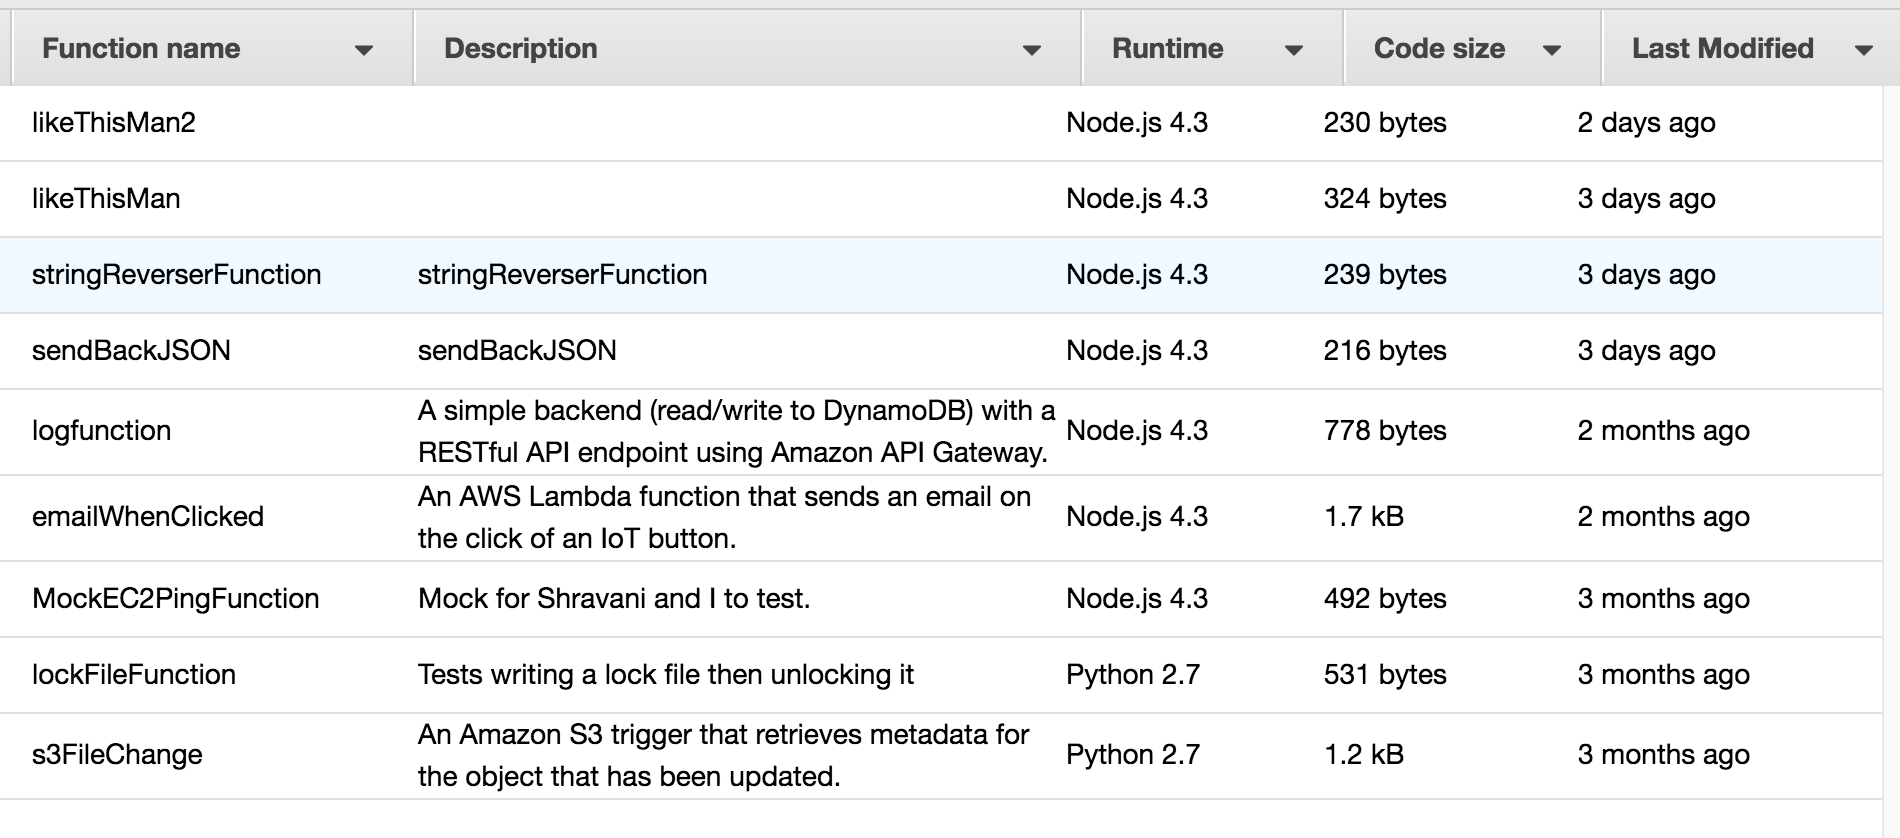
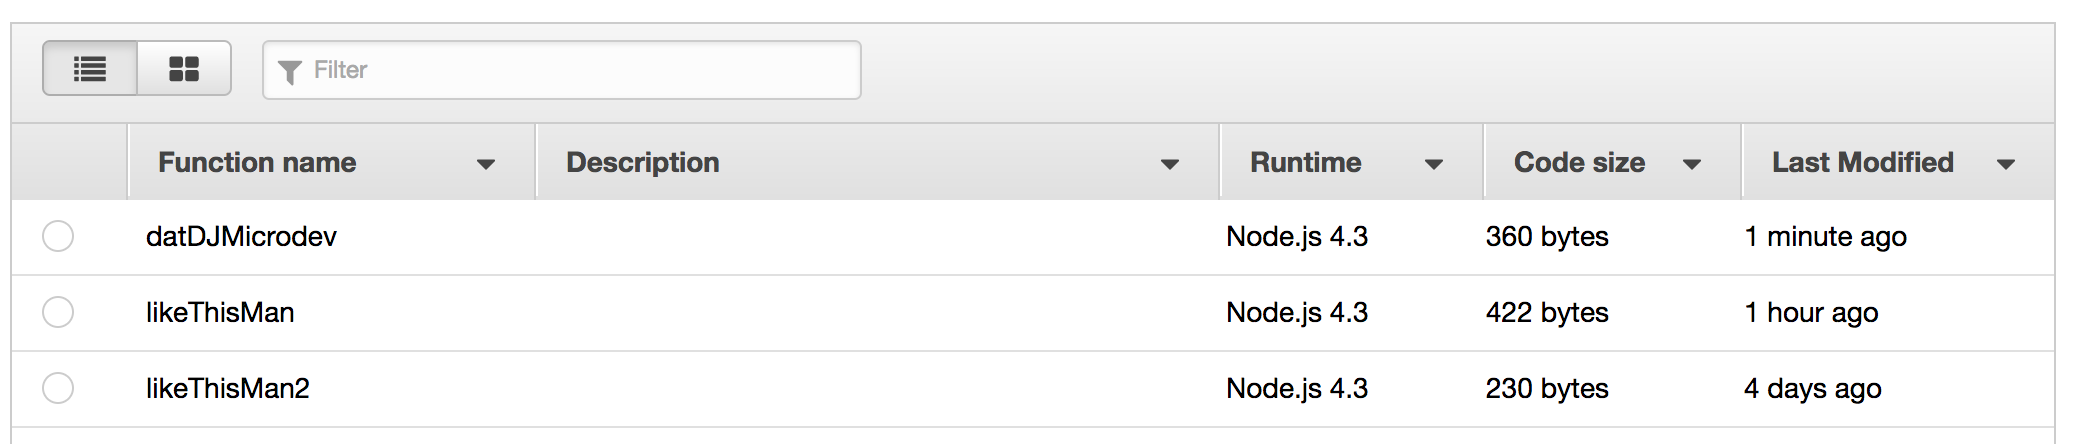
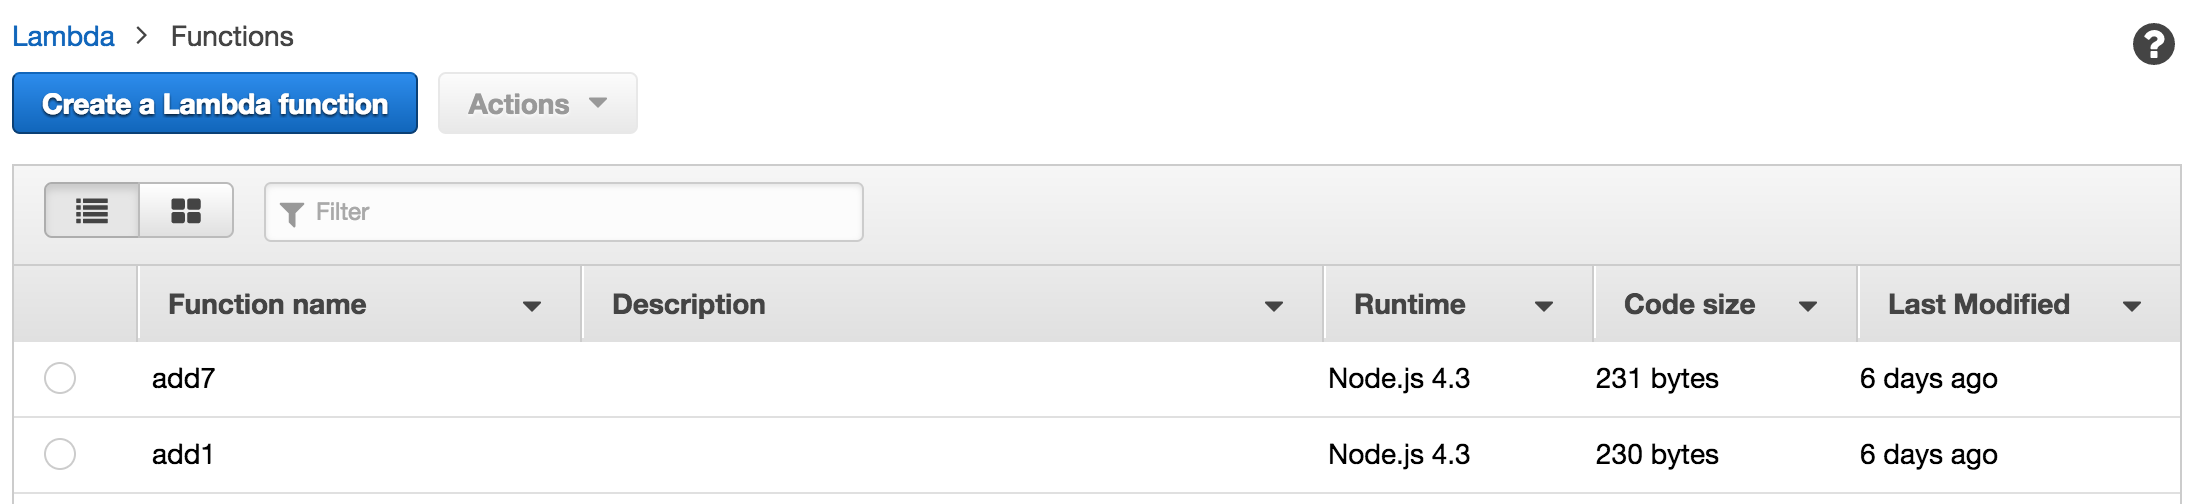
};The listFunctions will list all the Lambda functions you have in your account. Here’s my personal play one:
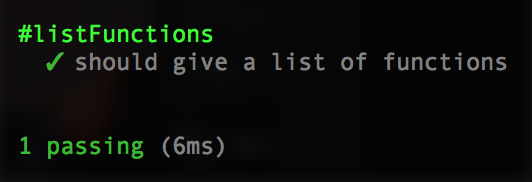
Now re-run your test and she should be Corbin Dallas green.
Now let’s manually integration test to verify we can use the API in an authenticated way and our code works. Modify your listFunctions so we can see the goodies that come back via a logging of the data:
lambda.listFunctions(params, (err, data)=>
    {
        if(err)
        {
            log("lambda::listFunctions error:", err);
            return callback(err);
        }
        log("lambda::listFunctions, data:", data);
        callback(undefined, data);
    });
Run node index.js and you should see some JSON in your Terminal.
Let’s add 1 more test for a negative scenario in case we don’t have permissions, bad credentials, etc.
const mockBadLambda = {
listFunctions: (params, cb) => cb(new Error('boom'))
};
// ...
it('should blow up if something goes wrong', (done)=>
{
listFunctions(mockBadLambda, (err, data)=>
{
err.should.exist;
done();
});
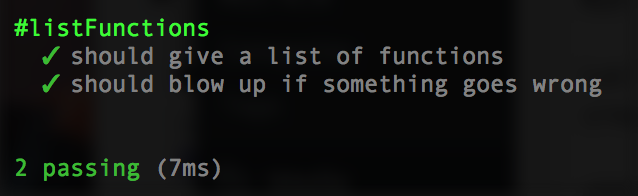
});Re-run and you should have 2 passing tests.
Step 5: Create Lambda Function
Lambda functions require (Jesse Warden’s way) 4 things:
- A name prefix. You’ll often have at least 2 different functions to test development vs. production servers. So “myapp-dev” vs. “myapp-prod”. The “myapp” is your prefix.
- An alias. While AWS is implying they’d like you to use dev, qa, and prod, we’ll just use one called “defaultalias”. Sometimes this is referred to as a qualifier.
- A function name. It’s what you see in the left column of the aws console.
- The code, heh! I put mine in a zip file called “deploy.zip”. For now we’ll zip up our index.js file into a zip first. It’s easier to do this with shell, but THE HAMMER IS JS AND EVERYTHING IS A NAIL.
- A role.
Note On Roles (Feel free to skip)
My last article talked about creating a custom role, but we can use the default one Amazon provides called “lambda_basic_execution”. I’ll hardcode it for this tutorial. Note the number in it is your AWS account number. Given in a production environment this would something your team or a OPS/Cloud/Security team would create, we’ll create a variable for it vs. getting it dynamically. Roles are complicated and are the #1 thing to break your code next to security things (VPC, subnets, security groups).
Let’s now create a lambda function. In your build.test.js, first import it:
const {
    listFunctions,
    createFunction
} = require('./build');
Then add a new method to our Lambda mock:
createFunction: (params, cb) => cb(undefined, {"FunctionArn": 'default'})When you create a new Lambda function, it’ll return a big ole JSON object mirroring mostly your parameters. The FunctionArn is the unique ID/URL of our function, so if we get this, we know she’s legit and it worked. We’ll add a new predicate to test for this String as well as a new test:
const legitString = (o) => _.isString(o) && o.length > 0;
const mockFS = {
readFileSync: (filename)=> new Buffer('')
};
describe('#createFunction', ()=>
{
it('should give us a positive response', (done)=>
{
createFunction(mockLamba, mockFS, (err, data)=>
{
legitString(data.FunctionArn).should.be.true;
done();
});
});
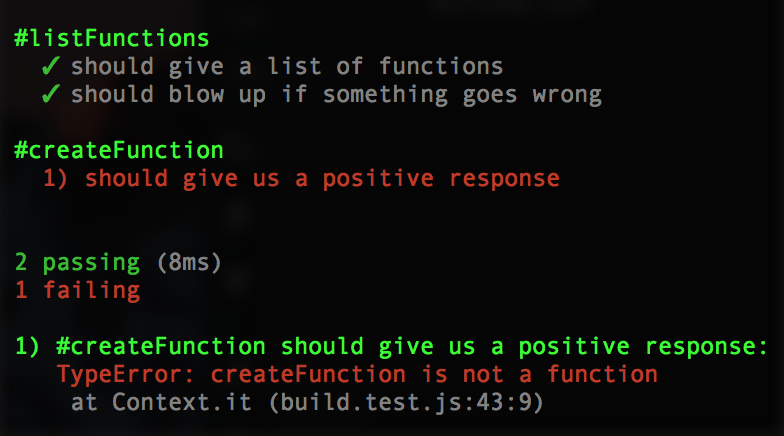
});Running it should fail:
Let’s make it pass. This’ll require a bit more variables setup first. Add your createFunction to the build.js:
const createFunction = (lambda, fs, callback)=>
{
    var params = {
        Code: {
            ZipFile: fs.readFileSync('deploy.zip')
        },
        FunctionName: FUNCTION_NAME,
        Handler: 'index.handler',
        Role: ROLE,
        Runtime: 'nodejs4.3'
    };
    lambda.createFunction(params, (err, data)=>
    {
        if(err)
        {
            // console.log("err:", err);
            return callback(err);
        }
        // log("data:", data);
        callback(undefined, data);
    });
};
And ensure you’ve exported the function below:
module.exports = {
listFunctions,
createFunction
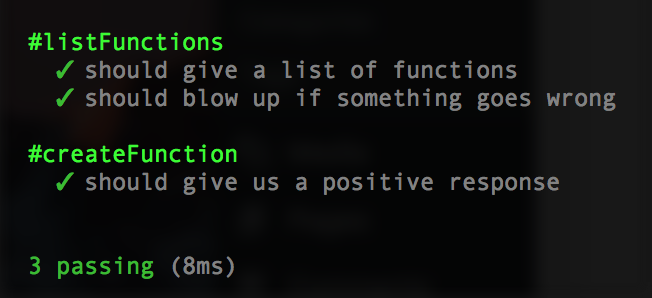
};No re-run npm test and it should pass:
Let’s add a negative test scenario in case the createFunction fails. Add a createFunction to the mockBadLambda:
createFunction: (params, cb) => cb(new Error('boom'))Then add the negative test for it:
it('should blow up if something goes wrong', (done)=>
{
createFunction(mockBadLambda, mockFS, (err, data)=>
{
err.should.exist;
done();
});
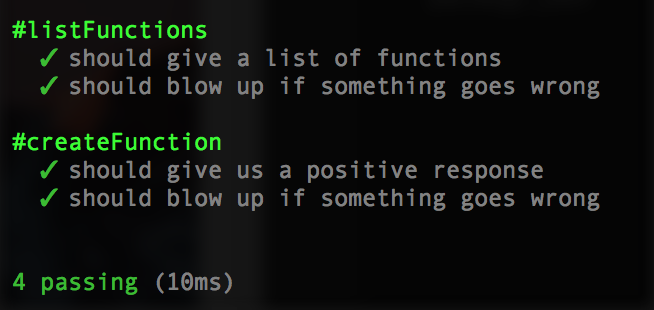
});Your tests run now should show:
Make and Destroy Deploy ZIP
Note Shell vs. JavaScript: While you can use a pure JavaScript solution using archiver (ensure you use forceZip64 in the constructor), now that PC’s have shell baked in, it’s easier to read, less code to write, and more predictable.
When you create a Lambda function, you need to upload code in the same call. Typically our code is more than just 1 index.js file, it’s many libraries in node_modules, configure files, etc. For file size reasons and ease of portability, we zip it all up into 1 smaller file. If you look at our createFunction you’ll see she reads it into a Node Buffer.
To create it and delete it ourself, we just need to add 2 new script commands to our package.json:
"makezip": "zip deploy.zip index.js",
"deletezip": "rm -f deploy.zip"
Test yourself by running npm run deletezip and npm run makezip.
Give createFunction a Spin
Let’s give her a go. Open up index.js, and at the very bottom, just go ahead and hardcode:
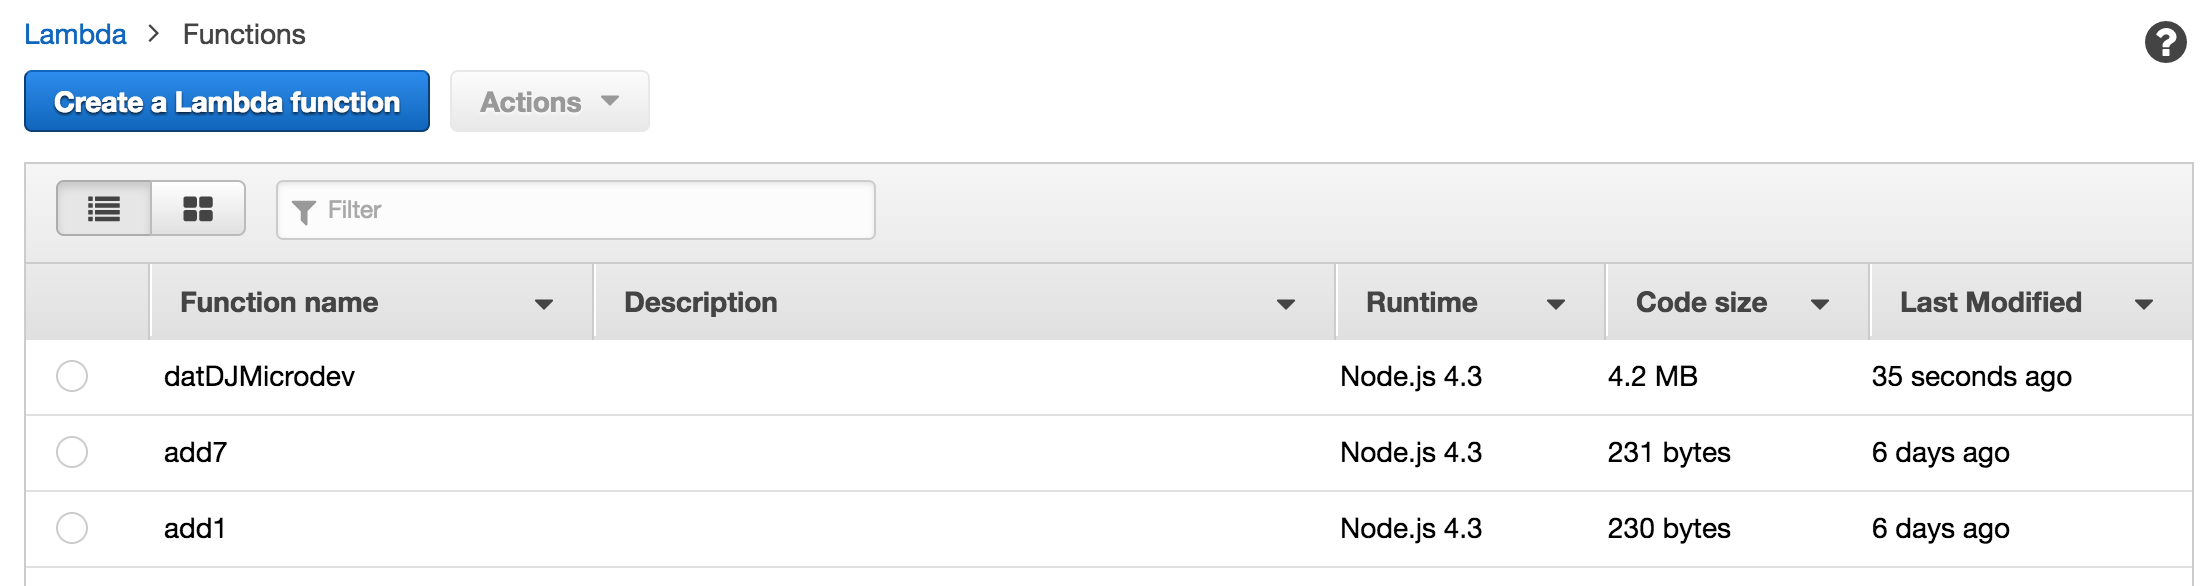
createFunction(lambda, fs);You should now be able to log into the AWS Console and see your new Lambda function in the list:
Wunderbar! Now, delete your hardcoded createFunction from index.js.
Step 6: Delete Your Lambda Function
Your function is created. If you want to update code in it, you could simple make a new zip file and call updateFunctionCode. However, to make things truly immutable and atomic, meaning each individual aspect of our Lambda we can test and update individually, we’ll just delete the whole thing.
Remember, we’re not treating our server like a nice camera. Instead, we purchase a disposable one at the local drugstore/apothecary, and if it breaks, we get a new one instead of waisting time debugging a $9.25 single use electronic. This is important for deploying specific versions of code. If you deploy a git tag called “2.1.6”, but you later update code, you’ve negated the whole point of using a specific git tag since it’s not really 2.1.6, but your own version. If something goes wrong, you know for sure (mostly) that’s that version of the code and not your modification.
In build.test.js, import the non-existent deleteFunction:
const {
	listFunctions,
	createFunction,
	deleteFunction
} = require('./build');
Add a mock method to our mockLambda:
deleteFunction: (params, cb) => cb(undefined, {})And a mock method to our mockBadLambda:
deleteFunction: (params, cb) => cb(new Error('boom'))And finally our 2 tests:
describe('#deleteFunction', ()=>
{
	it('should delete our lambda if there', (done)=>
	{
		deleteFunction(mockLamba, (err)=>
		{
			_.isUndefined(err).should.be.true;
			done();
		});
	});
	it('should not delete our lambda if it', (done)=>
	{
		deleteFunction(mockBadLambda, (err)=>
		{
			err.should.exist;
			done();
		});
	});
});
If our Lambda works, we get no error. The call gives you an empty Object back which is worthless, so we just bank on “no error is working code”. Let’s write the implementation. In build.js, put in the following code above your module.exports:
const deleteFunction = (lambda, callback)=>
{
    var params = {
        FunctionName: FUNCTION_NAME
    };
    lambda.deleteFunction(params, (err, data)=>
    {
        if(err)
        {
            // log("lambda::deleteFunction, error:", err);
            return callback(err);
        }
        // log("lambda::deleteFunction, data:", data);
        callback(undefined, data);
    });
};
And then add to your module.exports:
module.exports = {
listFunctions,
createFunction,
deleteFunction
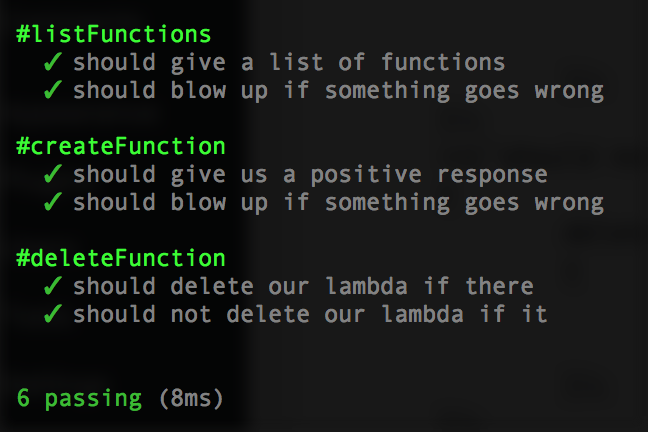
};Cool, now re-run npm test:
Let’s give her a spin. Hardcode deleteFunction(lambda, ()=>{}); at the very bottom, run node build.js, then log into the AWS Console for Lambda, and you should no longer see ‘datMicro’ (or whatever you called it) in the left list.
Step 7: Making Testable Code by Testing It
There are a few more steps to go in making our Lambda fully functional with the API Gateway. However, we can at this point test her out in the AWS Console. That means we can test her out in JavaScript, too. Let’s take a look at the original Lambda function code:
exports.handler = (event, context, callback) =>
{
    const response = {
        statusCode: '200',
        body: JSON.stringify({result: true, data: 'Hello from Lambda'}),
        headers: {
            'Content-Type': 'application/json',
        }
    }
    callback(null, response);
};
A few problems with this handler. First, it’s not testable because it doesn’t return anything. Second, it doesn’t really take any inputs of note. Let’s do a few things. We’ll add some unit tests, a function that always returns true, and a random number function.
Always True
Create an index.test.js file, and add this code as a starting template:
const expect = require("chai").expect;
const should = require('chai').should();
const _ = require('lodash');
const {
	alwaysTrue
} = require('./index');

describe('#index', ()=>
{
    describe('#alwaysTrue', ()=>
    {
        it('is always true', ()=>
        {
            alwaysTrue().should.be.true;
        });
    });
});
Modify your package.json to point to this test for now:
"scripts": {
    "test": "mocha index.test.js",
    ...
},
Now run npm test. Hopefully you get something along the lines of:

To make it pass, create the predicate:
const alwaysTrue = ()=> true;Then export at the very bottom:
module.exports = {
    alwaysTrue
};
Re-run your npm test, and it should be green:
module.exports = {
    alwaysTrue
};
Testing random numbers is hard. For now, we’ll just verify the number is within the range we specified. In index.test.js import the new, non-existent, function:
const {
	alwaysTrue,
    getRandomNumberFromRange
} = require('./index');
And a basic test, as we’re not handling bounds or typing checks for now:
describe('#getRandomNumberFromRange', ()=>
{
    it('should give a number within an expected range', ()=>
    {
        const START = 1;
        const END = 10;
        const result = getRandomNumberFromRange(START, END);
        _.inRange(result, START, END).should.be.true;
    });
});
Re-run your tests and it should fail (or perhaps not even compile).
Now implement the function in index.js:
const getRandomNumberFromRange = (start, end)=>
{
	const range = end - start;
	let result = Math.random() * range;
	result += start;
	return Math.round(result);
};
And export her at the bottom:
module.exports = {
alwaysTrue,
getRandomNumberFromRange
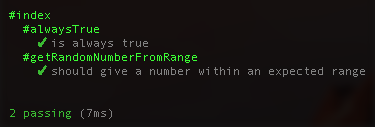
};Re-run your tests and she should be green:
Lastly, let’s rework our main Lambda function to always return a value, respond to a test, and become its own function as we’ll manually add it to the module.exports in a bit. In index.test.js, import the handler:
const {
	alwaysTrue,
    getRandomNumberFromRange,
    handler
} = require('./index');
And write the first test that expects it to return a response. Since we aren’t a typed language, we’ll create a loose one via a couple predicates to determine if it’s “response like”.
const responseLike = (o)=> _.isObjectLike(o) && _.has(o, 'statusCode') && _.has(o, 'body');And the test:
describe('#handler', ()=>
{
it('returns a response with basic inputs', ()=>
{
const result = handler({}, {}, ()=>{});
responseLike(result).should.be.true;
});
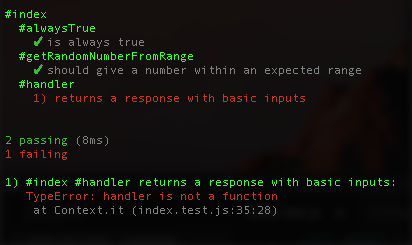
});For now the response is always an HTTP 200. We can add different ones later. Re-run your tests and she should fail:
Now let’s modify the function signature of our handler from:
exports.handler = (event, context, callback) =>to:
const handler = (event, context, callback) =>Move her above the module.exports and then add her to the exports. Final Lambda should look like this:
const alwaysTrue = ()=> true;
const getRandomNumberFromRange = (start, end)=>
{
	const range = end - start;
	let result = Math.random() * range;
	result += start;
	return Math.round(result);
};

const handler = (event, context, callback) =>
{
    const response = {
        statusCode: '200',
        body: JSON.stringify({result: true, data: 'Hello from Lambda'}),
        headers: {
            'Content-Type': 'application/json',
        }
    }
    callback(null, response);
};

module.exports = {
    alwaysTrue,
    getRandomNumberFromRange,
    handler
};
Our Lambda will return random numbers in the response based on the range you give it. We’ll have to create some predicates to ensure we actually get numbers, they are within range, and then return error messages appropriately. Our response in our handler will start to be different based on if someone passes in good numbers, bad numbers, bad data, or if it’s just a test. So, we’ll need to make him dynamic. Finally, we’ll add a flag in the event to make integration testing easier.
First, the litany of predicates for input checking. You’ll need 2 helper functions to make this easier. Create a new JavaScript file called predicates.js, and put this code into it:
const _ = require('lodash');

const validator = (errorCode, method)=>
{
	const valid = function(args)
	{
		return method.apply(method, arguments);
	};
	valid.errorCode = errorCode;
	return valid;
}

const checker = ()=>
{
	const validators = _.toArray(arguments);
	return (something)=>
	{
		return _.reduce(validators, (errors, checkerFunction)=>
		{
			if(checkerFunction(something))
			{
				return errors;
			}
			else
			{
				return _.chain(errors).push(checkerFunction.errorCode).value();
			}
		}, [])
	};
};

module.exports = {
	validator,
	checker
};
Now, let’s test the new, (soon to be) parameter checked handler in a few situations. At the top of index.test.js, import the handler function:
const {
	alwaysTrue,
    getRandomNumberFromRange,
    handler
} = require('./index');
Let’s add a new, more brutal negative test where we pass nothing:
it('passing nothing is ok', ()=>
{
    const result = handler();
    responseLike(result).should.be.true;
});
Let’s look at the responses and ensure we’re failing because of bad parameters, specifically, a malformed event. One test for a good event, one for a missing end, and one for our echo statement. Since the response is encoded JSON, we create a predicate to parse it out and check the result:
const responseSucceeded = (o)=>
{
    try
    {
        const body = JSON.parse(o.body);
        return body.result === true;
    }
    catch(err)
    {
        return false;
    }
};
// ...
it('succeeds if event has a start and end', ()=>
{
    const response = handler({start: 1, end: 10}, {}, ()=>{});
    responseSucceeded(response).should.be.true;
});
it('fails if event only has start', ()=>
{
    const response = handler({start: 1}, {}, ()=>{});
    responseSucceeded(response).should.be.false;
});
it('succeeds if event only has echo to true', ()=>
{
    const response = handler({echo: true}, {}, ()=>{});
    responseSucceeded(response).should.be.true;
});
None of those will pass. Let’s make ’em pass. Open index.js, and put in the predicates first. Import her up at the top:
// Note: the below only works in newer Node,
// not the 4.x version AWS uses
// const { validator, checker } = require('./predicates');
const predicates = require('./predicates');
const validator = predicates.validator;
const checker = predicates.checker;
Then below put your predicate helpers:
// predicate helpers
const eventHasStartAndEnd = (o) => _.has(o, 'start') && _.has(o, 'end');
const eventHasTestEcho    = (o) => _.get(o, 'echo', false);
const isLegitNumber       = (o) => _.isNumber(o) && _.isNaN(o) === false
These check the event for both a start and end property, or an echo. Lodash _.isNumber counts NaN as a number, even though NaN stands for “Not a Number” and is a Number per the ECMAStandard because “design by committee”. I wrangle the insanity by writing my own predicate that… you know… makes sense: isLegitNumber.
We’ll use them to build our argument predicates:
// argument predicates
const legitEvent = (o)=>
    _.some([
            eventHasStartAndEnd,
            eventHasTestEcho
        ],
        (predicate) => predicate(o)
    );
const legitStart = (o) => isLegitNumber(_.get(o, 'start'));
const legitEnd   = (o) => isLegitNumber(_.get(o, 'end'));
Now we have a lot of functions to verify if our event is acceptable. However, if it’s not acceptable, we don’t know why. Worse, users of your Lambda, both you in 2 weeks when you forgot your code, and other API consumers, won’t have any clue what they did either without cracking open the CloudWatch logs + your code and attempting to debug it.
We’ll take this a step further by using those validator and checker functions we imported above. Second, the validators:
// validators
const validObject = validator('Not an Object.', _.isObjectLike);
const validEvent  = validator('Invalid event, missing key properties.', legitEvent);
const validStart  = validator('start is not a valid number.', legitStart);
const validEnd    = validator('end is not a valid number.', legitEnd);
These functions are normal, they just take advantage of JavaScript and just about everything being a dynamic Object. That first parameter, the string error message, you can store on the function, so if it returns false, you know WHY it returned false. The checkers will accumulate those errors using a reduce function. Third, the checkers:
// checkers
const checkEvent       = checker(validObject, validEvent);
const checkStartAndEnd = checker(validStart, validEnd);
2 more predicates and we’re done. All Lambdas are required to have at least 1 response to not blow up. However, you and I know code either works or it doesn’t. There is middle ground, sure, but for simple stuff, it’s black and white. We’ll break those out into 2 predicates for creating our HTTP responses of errors:
const getErrorResponse = (errors)=>
{
    return {
        statusCode: '500',
        body: JSON.stringify({result: false, error: errors.join('\n')}),
        headers: {
            'Content-Type': 'application/json',
        }
    };
};
And success:
const getResponse = (data)=>
{
    return {
        statusCode: '200',
        body: JSON.stringify({result: true, data}),
        headers: {
            'Content-Type': 'application/json',
        }
    }
};
Armed with our predicates, we can have a flexible handler, and if something blows up, we will know why. Let’s break her down into 5 steps:
const handler = (event, context, callback) =>
{
    if(_.isNil(callback) === true)
    {
        return getErrorResponse(['No callback was passed to the handler.']);
    }
    ...
We’re ok with no event and context, but no callback!? That’s crazy talk. Here’s your t3h boom.
const errors = checkEvent(event);
if(errors.length > 0)
{
    callback(new Error(errors.join('\n')));
    return getErrorResponse(errors);
}
If our event isn’t legit (either and echo, or having start and end numbers), we send the array of errors we get back to whoever triggered us in an error callback. Instead of “I didn’t work”, they’ll have a fighting chance of knowing why since we sent them the validation messaging.
Quick Security Note
I should point out AWS walks the line of being secure and not giving you verbose errors while sometimes giving you what they can without compromising security to help you debug as a developer. You’ll note that my checkers tend to be verbose in the hope they’ll help whoever made a mistake. However, as things scale, you must be careful not to expose public information, or reveal too much about what you DON’T validate. I’m not a security guy, I don’t have the answers beyond lots of peer review of code, automated quality checks, and automated security scanning. You’ll note the obvious of not throwing stack traces back to the client. You can see those in CloudWatch if you wish.
if(event.echo === true)
{
    const echoResponse = getResponse('pong');
    callback(undefined, echoResponse);
    return echoResponse;
}
That’s for our future integration tests. It’s easier if our remote code is aware she’ll be pinged to see if she’s alive and well. We test for it to ensure it doesn’t negatively affect others. You can see the work that went into validating it as well as ensuring it played nice with others, yet still supported the ability to be tested without actually doing real work that could lead to leaky state.
const startEndErrors = checkStartAndEnd(event);
if(startEndErrors.length > 0)
{
    callback(new Error(startEndErrors.join('\n')));
    return getErrorResponse(startEndErrors);
}
Finally, we check to ensure if we’re going to do the random number generation, we have what we need from the event to do so, else, blow up and explain why. The real work is the end of the function:
const start = _.get(event, 'start');
const end = _.get(event, 'end');
const randomNumber = getRandomNumberFromRange(start, end);
const response = getResponse(randomNumber);
callback(undefined, randomNumber);
return response;
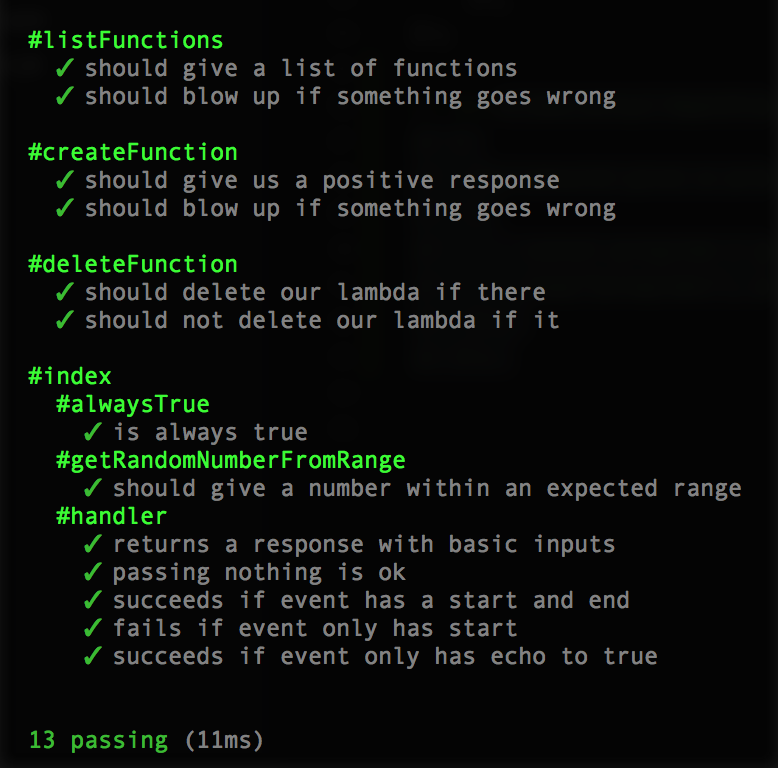
};Now re-running your tests should result in them all passing:
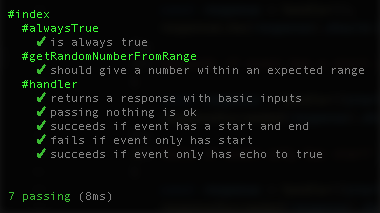
Manual Test
One last manual test you can do as well is simply run her in the node REPL. In the Terminal, type “node” and hit enter.

Then import your index module by typing lambda = require('./index') and hitting enter:
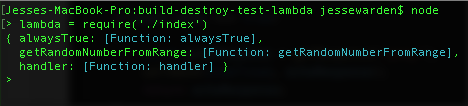
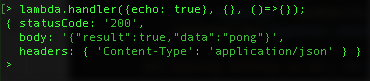
You’ll see our 3 functions we exposed. AWS only cares about your handler, so let’s manually test ours with some bogus data. Type lambda.handler() and hit enter, and you should see a 500 response:

Now let’s mirror our unit test by using, and give it some good inputs via handler({echo: true}, {}, ()=>{}); to get a basic 200 response:
You can Control + C twice to get out of Node.
Skills. Unit tests work, and a manual test works. Now you can be assured if you upload to AWS and she breaks, it’s them not you. Yes, your problem, but thankfully your self-esteem shall remain intact. Remember, part of programming is deflecting blame to others, backing it up with fancy terms like “I have lots of TDD code coverage”, then fixing “their” problem and looking like a hero.
Deploy Testable Code to AWS To Test There
Speaking of AWS, let’s redeploy and test our more testable code up on AWS. This’ll be a common task you do again and again by testing code locally, then re-deploying to test it on AWS. We’ll suffer through it for a bit so we appreciate the automating of it later.
For now, let’s adjust your makezip script in package.json to add our new files. We have to add predicates.js and our libraries which are in node_modules:
"makezip": "zip -r -X deploy.zip index.js predicates.js node_modules",We’ll hardcode our build script for now to destroy our stack first, then recreate it with whatever deploy.zip it finds locally. Open up build.js, and at the bottom, let’s chain together our deleteFunction & createFunction:
deleteFunction(lambda, (err, data)=>{
    log("deleteFunction");
    log("err:", err);
    log("data:", data);
    createFunction(lambda, fs, (err, data)=>
    {
        log("createFunction");
        log("err:", err);
        log("data:", data);
    });
});
You may get an error the first time since no function may be up there to delete and that’s ok. We’re creating & fixing one thing at a time. For now, it’s good enough if she creates your zip file and uploads it to your newly created Lambda function. We’re not differentiating between dependencies and development dependencies in node_modules, so your deploy.zip will be quite large, and may take more time to upload now that she’s not just under 1kb of text.
Run npm run deletezip, then npm run makezip, then node build… or just:
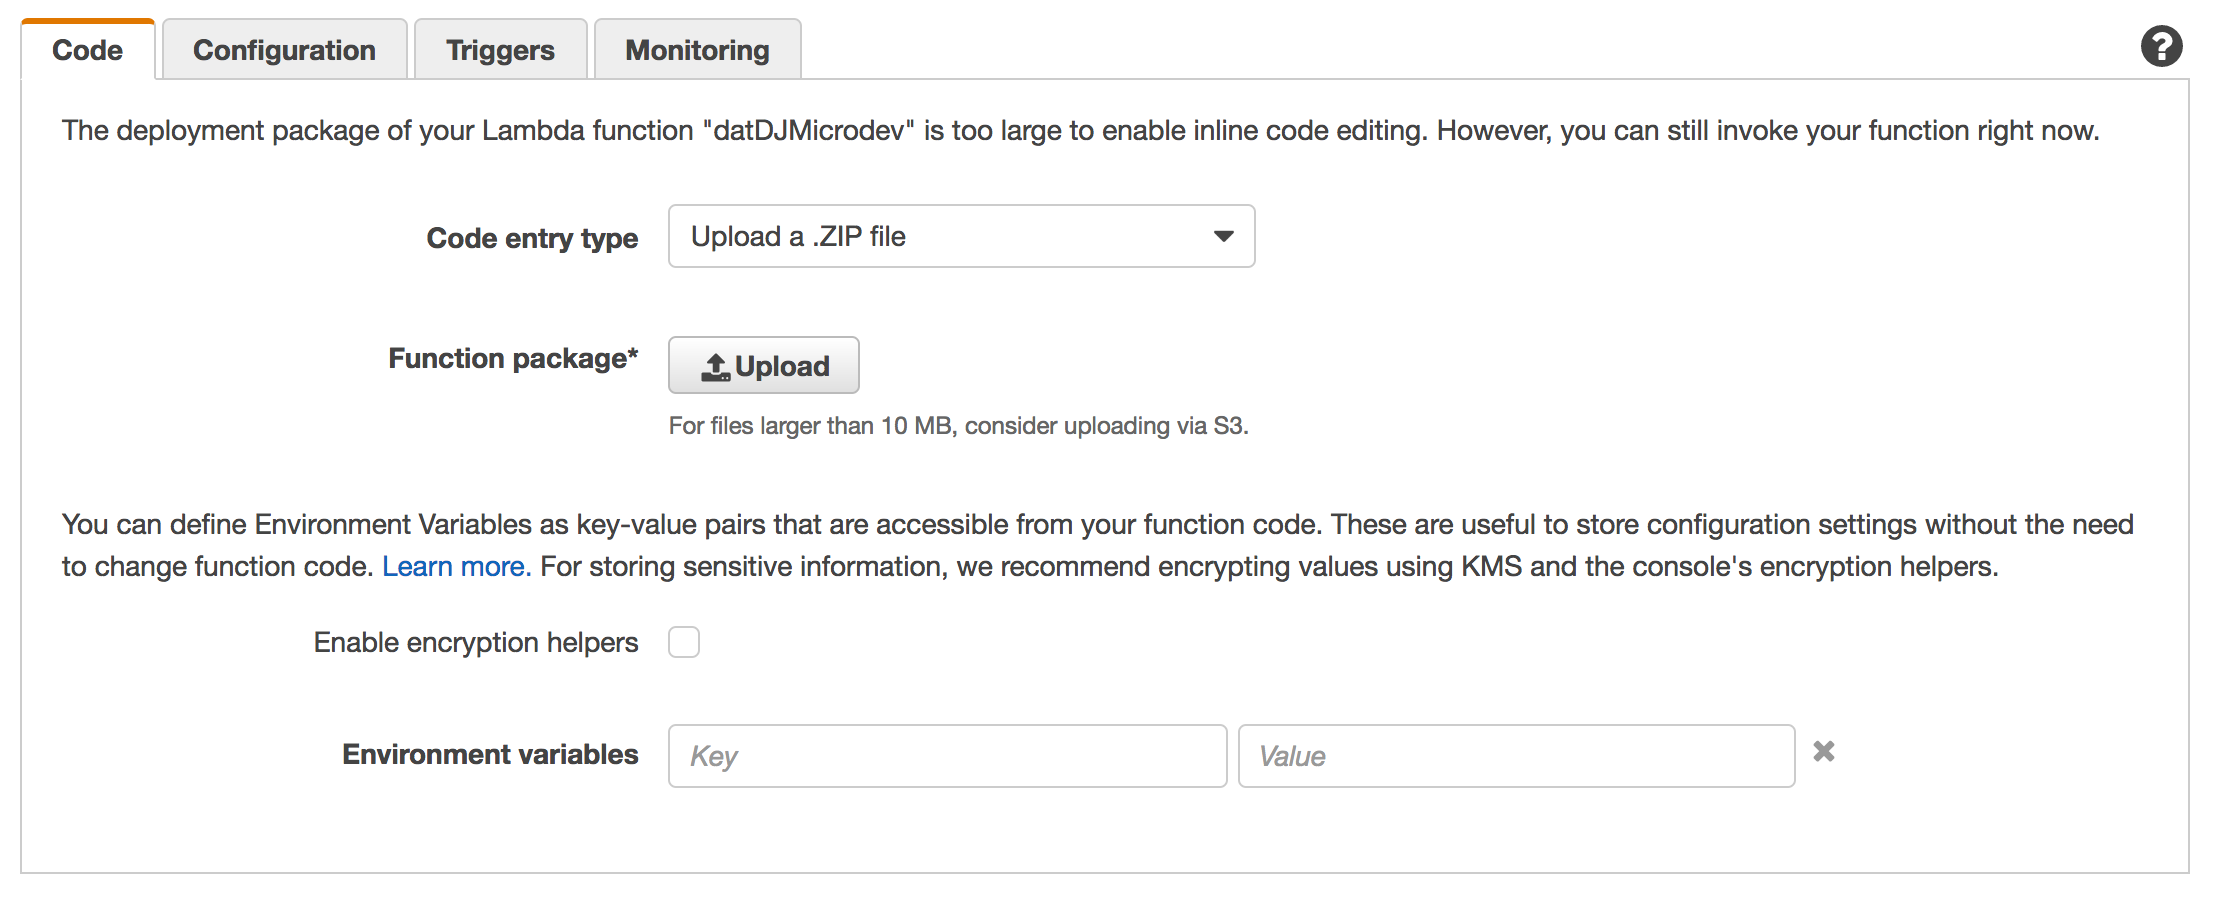
npm run deletezip && npm run makezip && node buildLog into your AWS Console and under Services choose Lambda. You should see your function in the list (they’re often sorted by newest up top). Notice she’s 4+ megs, t3h lulz. #myFLAFilesWereBigRaR #backInTheDay
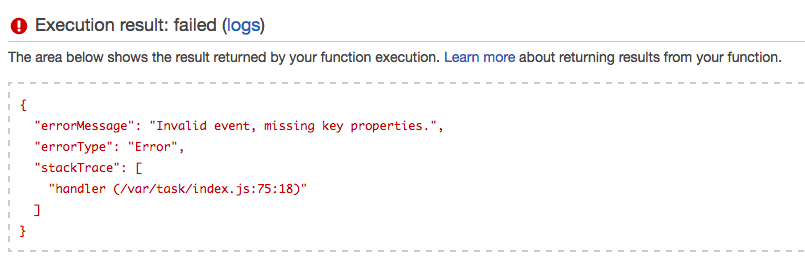
Click it, and let’s test it. You’ll see a big blue button at the top called “Test”. Click it. It should blow up with our custom blow up message:
Hot, let’s see if she correctly responds to our manual integration test. Click “Actions” and “Configure Test Event”. Here, you can basically make up your own event JSON to test your Lambda and it’ll run on AWS infrastructure. Ours is pretty simple, echo true. When done click Save and Test.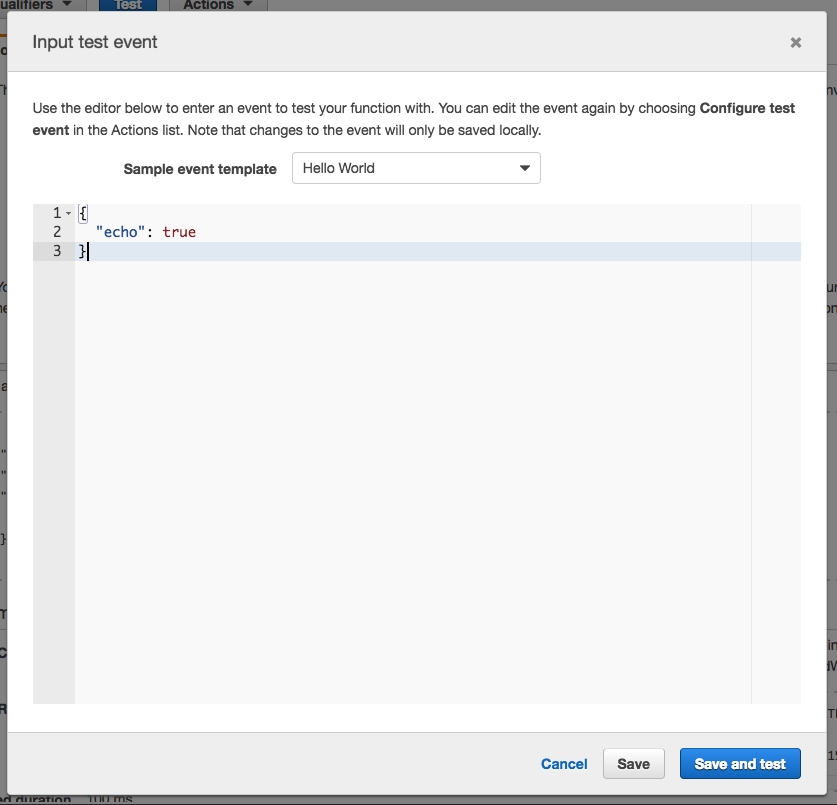
Now be careful; sometimes this window has a glitch where it’ll save “echo”: “true” instead of “echo”: true. The “true” String is not the same as the true Boolean that we want. All goes well, you’ll see:
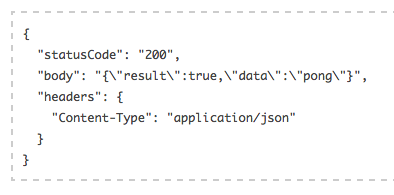
DAT PONG! Last manual test, let’s generate a random number. Again click Actions and Configure Test Event, and replace the fixture with:
{
  "start": 1,
  "end": 10
}
Save and Test…
![]()
Step 8: Build a Command-line Tool
To make our build.js more flexible, we’ll have to create our first command-line program in Node. There are a few command-line parsing libraries out there, but we’ll just create our own predicates so you learn how to do it yourself, this’ll be commonplace in creating command-line tools for yourself, and we won’t have weird test errors (hence the image).
Open build.js, and delete our buildFunction & creatFunction calls at the very bottom. We’re removing that hardcoded; instead of constantly modifying build.js, we’ll make it do what we want when we run it. Next, open up package.json, and let’s include both our tests now vs. switching between index or the build.
"scripts": {
    "test": "mocha *.test.js",
If you’ve never used globs before, that’s what the star is. It says “anything that has a .test.js suffix in the filename”. We have 2 tests, so if you run npm test now, you’ll get:
Green is gorrrrrrrgeous.
Let’s create a stub since this’ll be a constant create, add, test fail, test succeed workflow. Open build.js, and add:
const getProgram = (argsv)=>
{

};
Then at the bottom export him:
module.exports = {
    ...
    getProgram
};
In build.test.js, import our getProgram function:
const {
	...
	getProgram
} = require('./build');
We’re going to give this function our command line parameters and expect him to interpret what we meant.
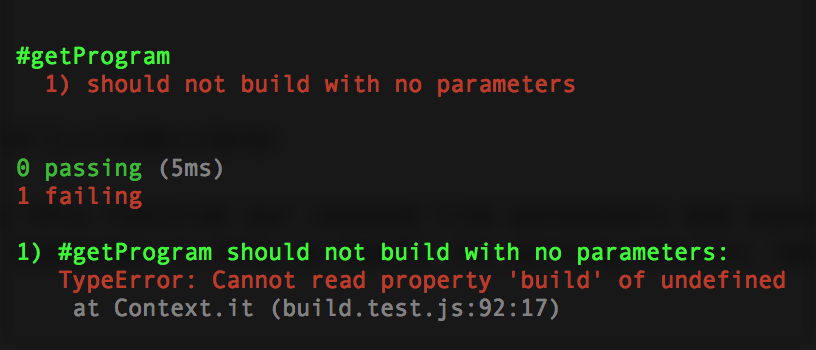
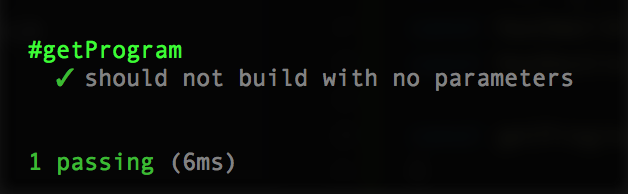
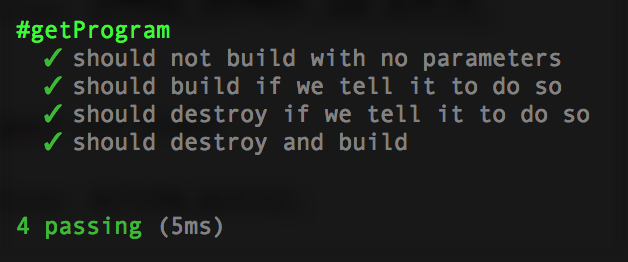
describe.only('#getProgram', ()=>
{
	it('should not build with no parameters', ()=>
	{
		const program = getProgram();
		expect(program.action).to.equal(ACTION_NOTHING);
	});
});
Now re-run npm test, and she’ll fail properly:
To make it pass, we just need to return a no-op (meaning, no operation, don’t do anything).
const getProgram = (argsv)=>
{
    if(_.isArray(argsv) === false)
    {
        return {action: 'nothing'};
    }

};
Re-run tests and it should pass:
There are the 3 things our program should do: nothing, build, and destroy.
const ACTION_NOTHING = 'nothing';
const ACTION_BUILD   = 'build';
const ACTION_DESTROY = 'destroy';
And export ’em out at the bottom of build.js:
module.exports = {
    ...
    ACTION_BUILD,
    ACTION_DESTROY,
    ACTION_NOTHING
};
To know which one, we’ll have to parse process.argsv, an array that holds all the arguments passed when starting a Node program.

The first, the location to the Node binary running it, and second, the build that’s being run, we don’t care about. Everything AFTER is fair game… or there could be dragons there; command-line programs are easy to fat finger (mis-type) so our Array could have some cray text in it.
We’ll strip out those first 2 items, and create some predicates that search for their items. The following predicates will get an Array, and see if -b or –build is in there.
const hasBigBuild   = (array) => _.includes(array, '--build');
const hasSmallBuild = (array) => _.includes(array, '-b');
const hasBuild      = (array) => hasBigBuild(array) || hasSmallBuild(array);
And these for destroy:
const hasBigDestroy   = (array) => _.includes(array, '--destroy');
const hasSmallDestroy = (array) => _.includes(array, '-d');
const hasDestroy      = (array) => hasBigDestroy(array) || hasSmallDestroy(array);
If you have both, we’ll make the assumption now that you want to destroy your stack first, then build a fresh new one. This is a pretty common practice we’ll be doing, so we’ll bake in this assumption now vs. coding error logic for telling the developer they provided competing instructions. So let’s add that instruction to avoid ambiguity, and the predicate to test for it.
const ACTION_DESTROY_AND_BUILD = 'destroy and build';
...
const hasDestroyAndBuild = (array) => hasBuild(array) && hasDestroy(array);
...
module.exports = {
    ...
    ACTION_DESTROY_AND_BUILD
};
Let’s create a new test detecting our build instructions. In build.test.js, import the action up top:
const {
	...
	ACTION_BUILD
} = require('./build');
Then the test:
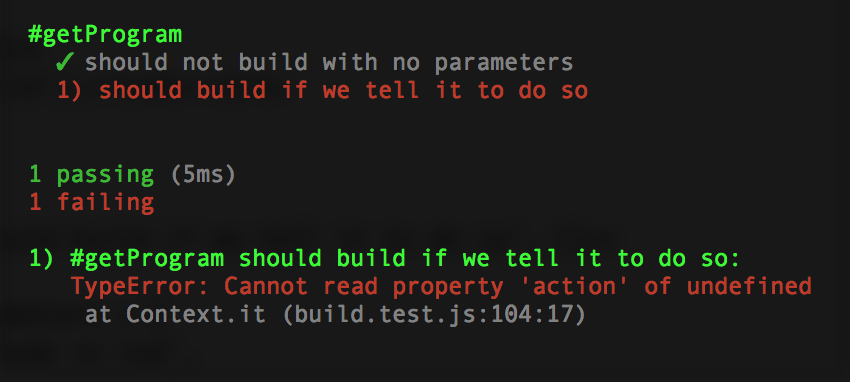
it('should build if we tell it to do so', ()=>
{
	const parameters = [
		'node is rad',
		'testing bro',
		'--build'
	];
	const program = getProgram(parameters);
	expect(program.action).to.equal(ACTION_BUILD);
});
Run your test and she should boom:
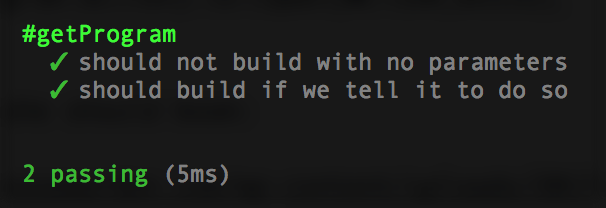
Add this to the bottom of the getProgram function:
if(hasBuild(argsv) === true)
{
    return {action: ACTION_BUILD};
}
Now re-run your tests:
… and the destroy test in build.test.js, import destroy action:
const {
	...
	ACTION_DESTROY
} = require('./build');
And the test:
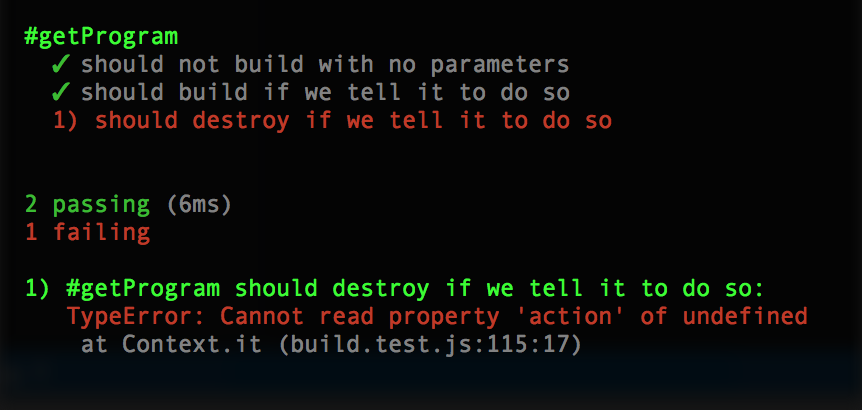
it('should destroy if we tell it to do so', ()=>
{
	const parameters = [
		'node is rad',
		'testing bro',
		'--destroy'
	];
	const program = getProgram(parameters);
	expect(program.action).to.equal(ACTION_DESTROY);
});
Running it should show the failure:
To make it pass, we need to check for a destroy below (or above) the build:
if(hasDestroy(argsv) === true)
{
    return {action: ACTION_DESTROY};
}
And re-running the tests should show passing:

Finally, let’s test for both. Import the action:
const {
	...
	ACTION_DESTROY_AND_BUILD
} = require('./build');
and copy paste the test:
it('should destroy and build', ()=>
{
	const parameters = [
		'node is rad',
		'testing bro',
		'--destroy',
		'--build'
	];
	const program = getProgram(parameters);
	expect(program.action).to.equal(ACTION_DESTROY_AND_BUILD);
});
To make it pass, let’s add the final piece to our build.js:
const getProgram = (argsv)=>
{
    if(_.isArray(argsv) === false)
    {
        return {action: ACTION_NOTHING};
    }

    if(hasDestroyAndBuild(argsv) === true)
    {
        return {action: ACTION_DESTROY_AND_BUILD};
    }

    if(hasBuild(argsv) === true)
    {
        return {action: ACTION_BUILD};
    }

    if(hasDestroy(argsv) === true)
    {
        return {action: ACTION_DESTROY};
    }

    return {action: ACTION_NOTHING};
};
Re-run your tests:
Now that we can parse command-line parameters, let’s write the code that will perform those actions. No tests for this function, just copy pasta this into build.js:
const performActionIfPassed = (callback)=>
{
    const program = getProgram(process.argv);
    if(program.action === ACTION_BUILD)
    {
        createFunction(lambda, fs, callback);
    }
    else if(program.action === ACTION_DESTROY)
    {
        deleteFunction(lambda, callback);
    }
    else if(program.action === ACTION_DESTROY_AND_BUILD)
    {
        deleteFunction(lambda, (err, data)=>
        {
            createFunction(lambda, fs, callback);
        });
    }
};
Then at the bottom, we’ll use a snippet to identify if we’re running through node build.js then run our build code; if not, our build.js is being required, so do nothing.
if(require.main === module)
{
    performActionIfPassed((err, data)=>
    {
        log("Done.");
    });
}
Let’s take her for a spin. Open up your Terminal, cd to the code directory, and run node build --build --destroy. If you left your logging uncommented, she may just sit there for a bit as it uploads the zip file (remember, she’s big currently). Also, deleteFunction may throw an error if the function isn’t created, and that’s ok.

My deleteFunction through an error, but that’s ok, the create worked. Now that we have a function, let’s try just a destroy via node build --destroy:

And looking at our Lambda function list again:
Yay! Lastly, let’s just do a single build via node build --build:
Last step in this adventure is to make this all 1 command. Open your package.json, and let’s add a new script:
"scripts": {
    ...
    "deploy": "npm run deletezip && npm run makezip && node build --destroy --build"
  },
Now, anytime you change code and want to re-test it, simply run npm run deploy.
Step 9: Multiple Environments & Green Blue Deployment
Background on Environments
We use multiple environments for a lot of reasons. Here are the 2 most important:
- Your code can continue serving customers while you work on it.
- Your code often breaks when it moves to a new environment. You create at least 3 so there is no penalty of breaking production when you move your code from a dev to qa. Once you’ve practiced this a couple times, you can make the hopefully more confident move from qa to prod.
Environments are a higher level term, but usually mean a different server with a different URL or IP address. Even servers that are the exact same hardware, OS, versions, and software still can have code break. Some issues you know about, others are part of the discovery process of moving environments.
There is no standard. The most typical is dev for “developers to play with code”. QA for “quality assurance people to test the most solid code”. Staging as the last environment change check before prod. Prod is production.
Some teams use more. Some use less.
While there is a strong push towards immutable infrastructure, prod still remains special. In immature software organizations, prod is often the only thing users see. There is a trick to ensure prod remains working when you push new code to it called green / blue deployment. You create 2 virtual servers on prod. They are identical with one difference: one has a name of green, and one of blue. Users are using a URL to see the green server. You move code to blue. Once you validate blue is working, you switch the URL to point to blue. This is really fast. Sometimes. This is also really easy to undo if something goes wrong. Sometimes.
Environments for Lambdas?
Given that Lambdas are “always up”, yet you’re only charged for when they actually run, do you really care about environments? What about green / blue deployment?
Sadly, yes.
Security
you’ll still potentially have different security in place for each environment. In AWS’ case, this is VPC (virtual private cloud), subnets, and security groups (things that determine what you can do, what ports are open, etc).
Dev’s Use Dev
You’ll have users and other developers in the case of microservices, actively depending upon certain environments to be accessible and behave a certain way.
Dev’s Use QA for their QA
Microservices additionally are often a chain in a larger application, many they intentionally don’t know about. As such, other teams may use your QA service in their QA environment to mirror how you’re developing software.
No Downtime
Updating a Lambda, while super quick (seconds if just updating the function code without publishing a new version), you’ll still experience downtime if someone’s hitting that server.
Rollback Window
If you update a Lambda and break the code, you increase that break window until your rollback to old code is finished. Lambda versions can potentially help here. (I don’t use them)
Green / Blue with Lambdas
Finally, the easiest way to update production Lambdas is still green/blue. Users can actively be using them, or they can be being used in an activate AWS Step Function process, and you can ensure you don’t cause them downtime. The muddy ground here is “What is the URL?”
For example, not all Lambdas are triggered by an API Gateway URL. While you can change the Lambda function an API Gateway is aimed at by just changing the ARN, things get a tincy bit more complicated with S3 bucket, SNS, and CloudWatch notifications. For example, at the time of this writing S3 buckets only allow 1 bucket notification, per bucket. You can remove that notification and add it back, but if you’re dealing with extremely low latency systems, you can miss Object:put events to the bucket while your infrastructure code is running. There are remedial steps here, no doubt, just recognize that green / blue still is a useful deployment pattern to minimize downtime, regardless of environment.
For use, we’ll use the name, such as “myLambda-green” and “myLambda-blue”. The S3 bucket policy, or API Gateway URL, or whatever, points to that named Lambda.
Where Does Environment Go?
Two places. There are 2 people who care about the environment: You, and the Lambda. You put it as part of the Lambda name so can easily scan the function list in the Lambda console, debug in CloudWatch easier, and the Lambda itself can help log. You’ll end up with many lambdas in a list that have the name “myLambda-dev-green”, “myLambda-dev-blue”, “myLambda-qa-green”, etc.
The Lambda consumes what environment it’s in from environment variables which can be encrypted if you wish. This ensures your code has no state, and just adopts whatever is there, regardless of it’s name. Given many enterprises have separate AWS accounts for both different parts of the organization, and production environments, you can help minimize the pain by making your code stateless and configurable by the environment variables.
Regions
Regions get a bit more complicated, but the short version is you just follow the same pattern of explicitly naming them and use environment variables. Many AWS function require a region parameter, so avoid typing ‘us-east-1’ directly into your code.
So… what do I do again?
Same Lambda, just different name for it to differentiate between dev, qa, and prod as well as green and blue. Your createFunction just has a different string. For example, “myLambda-green” and “myLambda-blue”. If you use environments, you can put those in the name too: “myLambda-qa-green” and “myLambda-qa-blue”.
In our code above, we’ve defined dev without a color, but you could simple add more strings:
const DEFAULT_ENVIRONMENT = 'dev';
const COLOR               = 'green';
const FUNCTION_NAME       = NAME_PREFIX + '-' + DEFAULT_ENVIRONMENT + '-' + COLOR;
Then run node build --build fro each color and environment.
Wait, Why Not Aliases and Versions?
Lambda Alises (dev, qa, and prod, green, blue, staging, live), and the Versions they point to (1, $LATEST, Git tag v2.3.7) are great. They allow for potentially easier management of environments and code versions to be managed in a centralized place if you use the AWS Console heavily. However, configuration and environment variables are global and can only be modified in $LATEST version.
Given I work in a high security environment where I test multiple configurations, and unlike S3 buckets, we currently do not have a cost in creating multiple Lambdas, it’s more flexible for the workflow my team has.
Step 10: Integration Test
We unit tested her locally. We manually tested her locally. We manually tested her remotely. In Step 7 we added an echo to more easily test if our Lambda is working without having it do actual work. Let’s automate all that.
Our first integration test invokes the Lambda function. It’s almost exactly the same thing as clicking the Test button, except Node is doing it instead of your finger. Create a new file called index.integrationtest.js and copy pasta this code into it:
const AWS      = require('aws-sdk');
AWS.config.loadFromPath('./credentials.json');
const lambda   = new AWS.Lambda();
const log = console.log;

const expect = require("chai").expect;
const should = require('chai').should();
const {
    handler
} = require('./index');


describe('#index integration', function()
{
    this.timeout(10 * 1000);

    describe('#echo', ()=>
    {
        it('responds to an echo', (done)=>
        {
            var params = {
                FunctionName: "datDJMicrodev",
                Payload: JSON.stringify({echo: true})
            };
            lambda.invoke(params, (err, data)=>
            {
                log("err:", err);
                log("data:", data);
                done(err);
            });
        });
    });
});
This will send the echo to our Lambda, and she’ll send the pong back. Run it by mocha index.integrationtest.js and she should report a true:

Conclusions
Creating a microservice for AWS Lambda is easy and straightforward. We’ve built one here in this article. Typically, though, you build many of them. Even if you’re building a monolith application, and your one microservice is pretty large, all the deployment problems still exist. As you’ve hopefully seen, AWS API’s give you powerful tools to put both the deployment and testing of those deployments in your hands.
As a developer, you can now write the microservice, tooling, testing, and deployment all in the same language in the same code repository. This code that handles your infrastructure follows the same peer review and unit/integrating testing best practices. Your infrastructure is now testable, high quality code controlled by you, the developer. While we’ve created multiple Lambdas that represent their environment and version, AWS provides powerful tools to handle Lambda Aliases and Versions, both in code and in the AWS console.
Frameworks like Serverless help you manage multiple services, have a nice way to test locally, and help you if you’re not familiar with AWS. YAML isn’t code, however. Writing your service, and infrastructure, in the same language helps you adopts the same testing and debugging practices for it.
Code (again in case you missed it)
The source code for this article is on Github.