If you saw the amount of work you have to do in my past article, you’ll appreciate how much work you DON’T have to do using the new Flex Component Kit for Flash CS3 (now on labs with 50% more beta!). I’ve modified my example from that article using the new kit to show you how much easier it is to both create Flash assets for Flex, but also to use them IN Flex 2. Deadline at work, so too little time to do another Captivate; hopefully images’ll do.
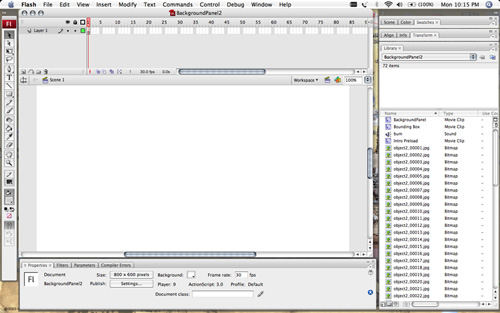
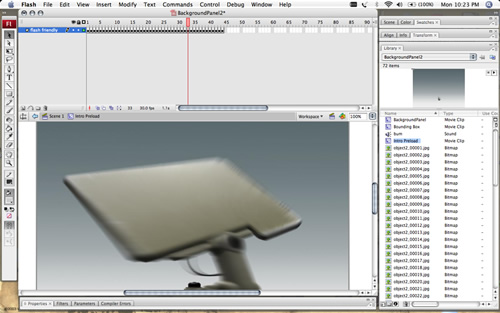
First, let’s take a look at the FLA in CS3 on my MacBook. Notice, nothing on the root timeline / stage.
Going into the BackgroundPanel symbol in the library, notice no code on frames. You can see the bottom layer is where I put my bounding box. This is a convention used since Flash 5 (before my time, hehe) which gives the MovieClip a “default width and height”. Now, for Flash components, this was typically used for the size methods written in ActionScript. In Flex, it does a whole lot more. Flex has a layout engine that measures MovieClip’s, and that way “knows” when to show scrollbars. By default UIMovieClip measures every frame so if your Flash animation increases in size, so too will your content in Flex. When you are playing inside of containers inside of Flex, this is VERY important. Here, though, I actually WANT to remain square. Therefore, I make a 800 x 600 MovieClip with an instance name of “boundingBox”.
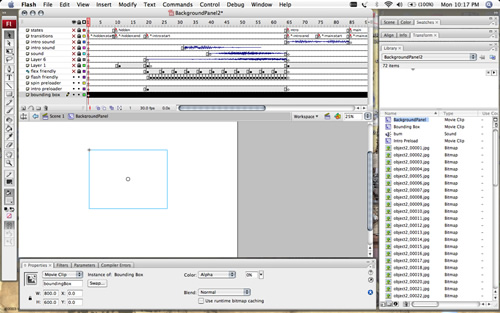
Now, the contract you have to abide by as a Flash Designer when creating assets for Flex is 2 things: states and transitions. You create different “states” that your component / animation exists in. In my panel’s case, these are: hidden, intro, main, and spin. Flash Developers typically would use either the timeline or different redraw methods. A Flex Developer uses the state tags. These 2 will now be combined. The Flash component will “represent” the state tags in Flex via frame labels on the MovieClip symbol’s timeline. This way, a Flex Developer can use the familiar syntax on your component:
panel.currentState = “spin”;
The second is transitions. Transitions are the changes that happen form one state to the next. For example, in my Login Form example, I show how you can change from one state to the other and give visual feedback to the user you’ve changed state. You represent transitions in Flash via specifically named frame labels.
For good or ill, transitions are (at least with the version I have) all or nothing. Most Flash Designers who are timeline junkies will read that and laugh. That’s the attitude. I’ve found the component acts weird if you only define transitions for some states, and not others. Best to do at least the default transition to each state.
One quirky thing is that the UIMovieClip will go to your state frame label when it’s done playing the transition, if any. I didn’t really like this. The compromise Adobe came up with is to put your state frame label on the same frame as your ending transition frame label. Now, most of us Flash Purists think putting 2 frame labels on the same frame is blasphemy… madness!
…however, it actually works out well here (thanks Glenn Ruehle!). It makes it easier for as an animator to have my ending transition “end” on the state. However, for more complex animations, like the one Grant Skinner showed at 360Flex, it actually behooves you to animate unique transitions for each state change.
For example, if I were animating a human character, he could have 3 states: stand, run, and sit. If I were to set the current state from sit to run, I wouldn’t want him to immediately start running; I’d have to animate him to stand first. For non-animators, this can seem like a lot of work. For those of us in the know, it’s necessary for a good looking component.
So, again, you may find another frame label timeline convention you dig; no worries.
The syntax for states are “my state”; basically whatever you want. The syntax for transitions is a little more complex. It follows the way transitions in Flex work. They have a “fromState” property and a “toState” property. Transitions are always bound to a state change. You can choose a state name as a string OR a *. A * means “any state”. So, if you write fromState=”*” toState=”spin”, that means anytime the state changes to spin, play this transition.
Frame labels in Flash use a “from-to:state” syntax. Dissecting this, the from is your from state, and can be the name of the state, OR *. Same goes for the to; the to state name or a *. The state is the name of the state, and must be a state name. Always put a start and end set of transition frame labels. If you misspell the frame label, currently there is no JSFL to help you out, and the Flex Dev will most likely get an error dialogue that isn’t easily debug-able. He’ll probably blame you so just make sure for every “start” you see an “end”. Keep in mind too that for some transitions, it’ll use the end frame to play them backwards depending on what state you are changing too, so animate accordingly.
You’ll notice for my simple example, I’ve been slack and just put the state frame labels at the end of the transition animations.
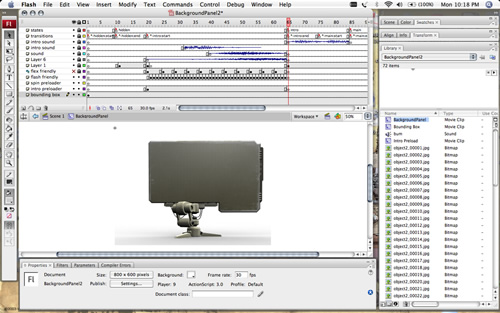
For example, if the Flex Developer were to use this component, and set the currentState = “intro”, then it would do a gotoAndPlay for the “*-intro:start” frame.
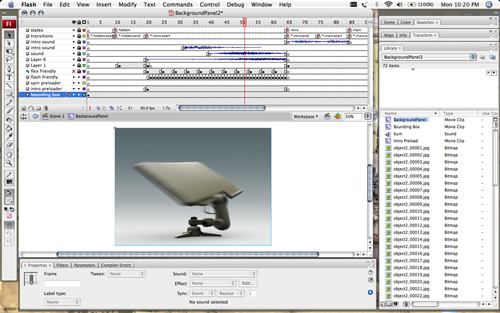
Same goes for the spin, regardless of what state you were on previously:
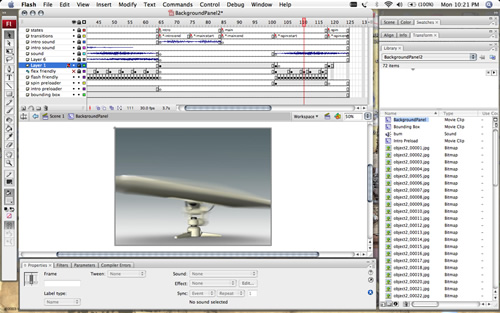
Notice that the main state doesn’t really have any transition; it’s just the main state where you mainly are, and thus it is plain Jane, reflective a main type of state. Word. Yes, it does have an event sound, though.
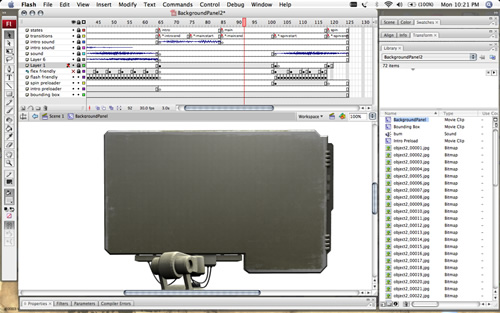
Now, when creating this component, you do what you typically do in Flash. Create a new MovieClip symbol, name it, and hit ok. You’ll notice the Linkage dialogue in Flash CS3 has a new field: All Your Base Class are Belong to Adobe. When you create a MovieClip in Flash CS3, it’ll default to flash.display.MovieClip. Good, leave it be, let it create your symbol.
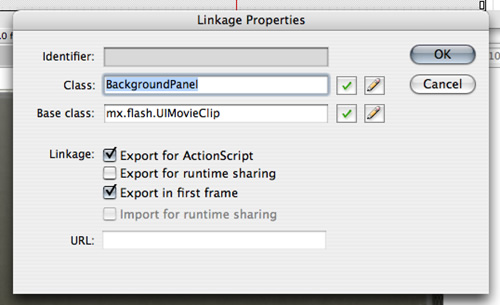
Later, you can run the Flex Kit JSFL command, and it’ll put the needed SWC in the Library, and then convert your symbol for you to have the correct base class (mx.flash.UIMovieClip); all you have to do is select it in the Library. It’ll tweak your FLA settings (in a good way) too.
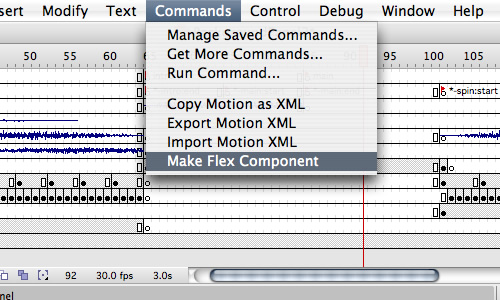
Poof; it’s exported as an SWC where your SWF usually is. Done!
Few more quirks. Flex states are based around the Flash Player 9 DisplayList model. DisplayObjectContainers are basically MovieClip like things. Except, instead of createEmptyMovie, attachMovie, duplicateMovieClip, unloadMovie, and removeMovieClip, we have a brand new API. This API allows us to create MovieClips, but NOT have them draw. In the past, we’d stop it’s animations, turn it invisible, move it off stage, and pray. This didn’t work so well with a ton of MovieClips. Now, we can just go:
var a:MovieClip = new MovieClip();
And call methods on it, but not actually have it automatically have to be drawn in some depth. Now, we go:
addChild(a);
And THEN it’ll draw. Cool, right? You can even re-parent it, and remove it without killing all the code on it. Dope.
Problem? Flex states are built atop this. When you go to a state, things are removed from the DisplayList and others are added. What happens to those that are removed? Flash Player does what it was built to do; it removes them from memory as needed.
Great for application developers, suck for designers. From the day I got into this industry, I’ve made it my mission to ensure my stuff plays hot, and if it means taking all of your CPU and RAM to do so, so be it; it’s there for the taking Blackbeard style.
The hack I showed at 360Flex has been modified slightly. Basically, I’d put all of the frames on a MovieClip, since those have to be preloaded before drawn, and then put it before the animation. Now, I’ve found better results doing the same thing, but having it last he entire tween. Notice the spin and intro preloader layers in the above pictures below the animations. You can see what’s inside of those MovieClips here. Technically, you should just put them all on one frame, but I ran out of time. I then just made them alpha 0. If you move the off-stage, the measuring code will think your Flash component got really really big, and then you’ll see scrollbars in Flex, and go wtf?
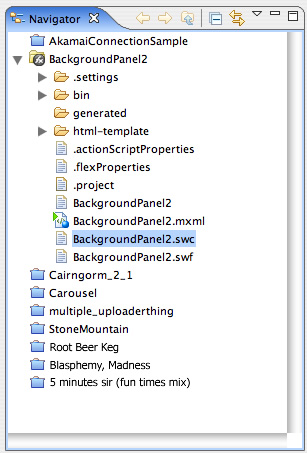
So, what do you do with your SWC? You give to the Flex Dev, and smoke ’em if ya got ’em. The Flex Dev then, if he’s a purist, he’ll throws it in a lib directory. For this example, I just throw it in the root project. You then link it to your Flex Project via adding it to the Flex Build path as a Library via Project > Properties, and then Flex Build Path, Library Path tab, and then Add SWC button.
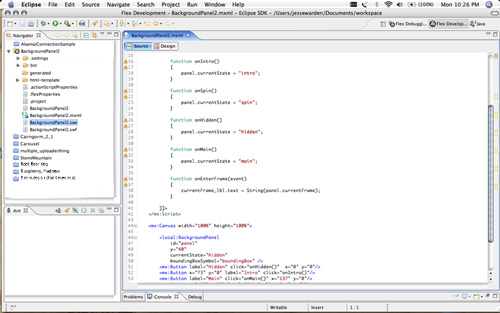
You’ll notice a sample implementation here with Buttons setting the current state of the panel. Notice the lack of strong-typing; I’m such a rebel (-es=true -as3=false -strict=false 4 uber h@X!!!).
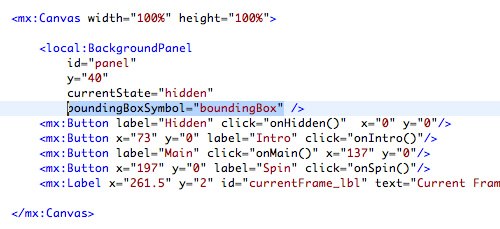
Now, I think I broke something, but the convention is “boundingBox”… or it’s ilk. You name your MovieClip that, and that’ll define your component’s rect. In MXML (or AS if you were so inclined) you can set the bounding box instance name to use. I don’t recommend this, but hey, freedom’s rad, choose what you want.
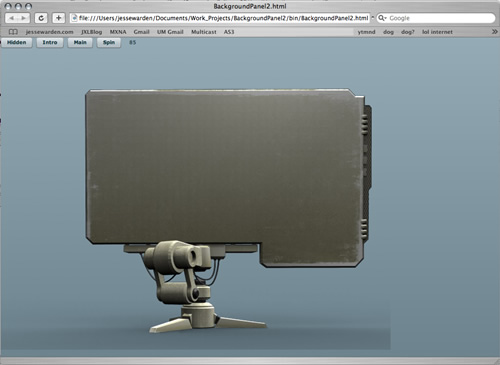
This’ll compile to something like this. If you’d like to play, click the image. WARNING: Has sound – she’s loud.
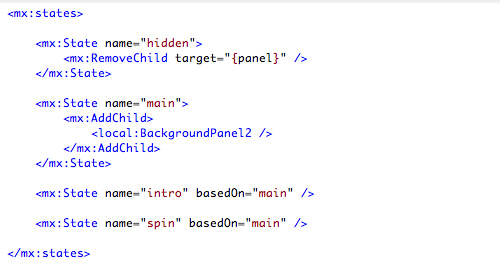
To give you a visual example of what this would look like in Flex (uber simplified btw), here’s the states defined in MXML instead.
And the corresponding (optional) transitions that match those states.
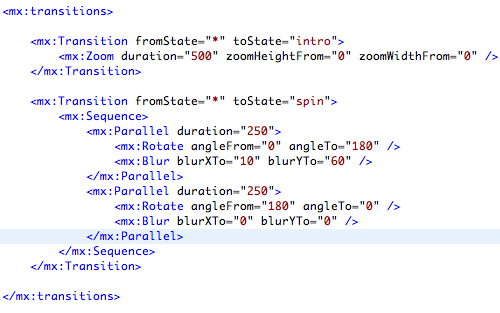
Some dig MXML, some dig Timelines, I dig both.
Few final tips. Every time you recompile a new SWC (Test Movie / Publish, whateva’), don’t forget to Refresh the Flex Project, or you’ll get the cached version. I usually use an Ant script to just copy the new .SWC from the assets directory (or however you setup your Flex projects). Also, not sure if it’s fixed, but if you’re Flex Dev starts getting code hints for “frame31():Object”, don’t be alarmed. If you put code on the timeline, I’m the only guy I know that fires people for that (except stops of course… I’m not THAT mean). These methods are merely created from code you have on that specific frame (thanks Robert Penner!).
One thing to notice in some of the above images of Flash’s timeline is the Flex friendly layer vs. the Flash friendly. You un-guide the Flex friendly one for development and testing. That way, Flex Builder doesn’t chug loading all of those uncompressed PNG’s into memory, thus making Flex Builder compiling really slow. When ready, you just un-guide the Flash friendly one, and re-guide the Flex friendly one, and finally recompile. Naturally, most people are using video nowadays or hand animated bitmaps & vectors which are immensely less RAM intensive. Then again, good to know.
Also, this whole example didn’t use any ActionScript. There is no reason I couldn’t make an ActionScript 3 class for my component. If you don’t write a class, Flash CS3 will make one for you. So, I didn’t have to make a “BackgroundPanel2.as” file. If I wanted to, I could of written an AS3 class to maybe play some other scripted animations, or play sounds… video, whatever.
Finally, don’t forget to remind the Flex Dev to up his framerate via the Application tag (or compiler… either or)!


